Using the Allotrac Interface with the Idealpos POS screen is fairly simple.
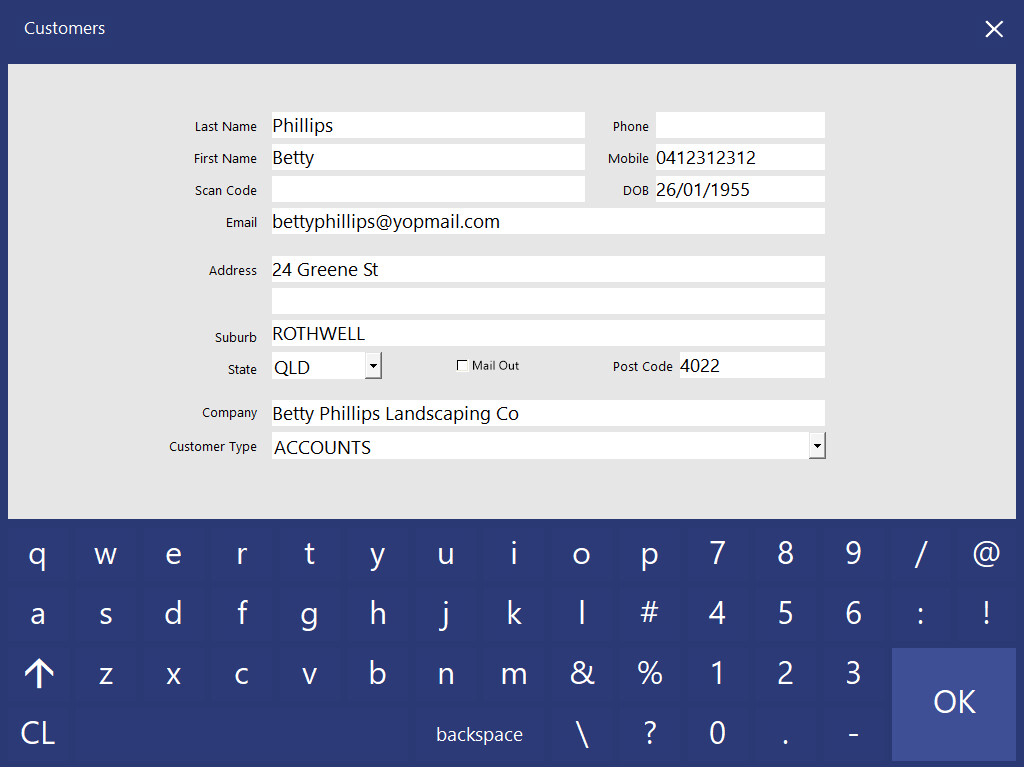
To begin, first add a Customer to the Sale.
You can either add an existing Customer to the sale, or you can create a new Customer.
Note that when using Customers with Allotrac, they will need to have a Company Name entered in their Customer record, otherwise it won't be possible to create a Delivery Job.
Add Customer to the Sale or Create a new Customer
Once the Customer has been created/added to the sale, you can add the required items that are linked to Allotrac via a Product ID (refer to this page for more information on how to assign Product IDs with Allotrac).
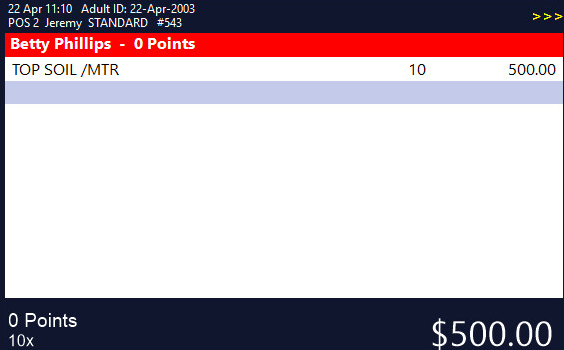
Once the item/s have been added to the sale, press the "Delivery Job" button on the POS screen (refer to this page for more information on how to create a Delivery Job button if the button hasn't been created already).
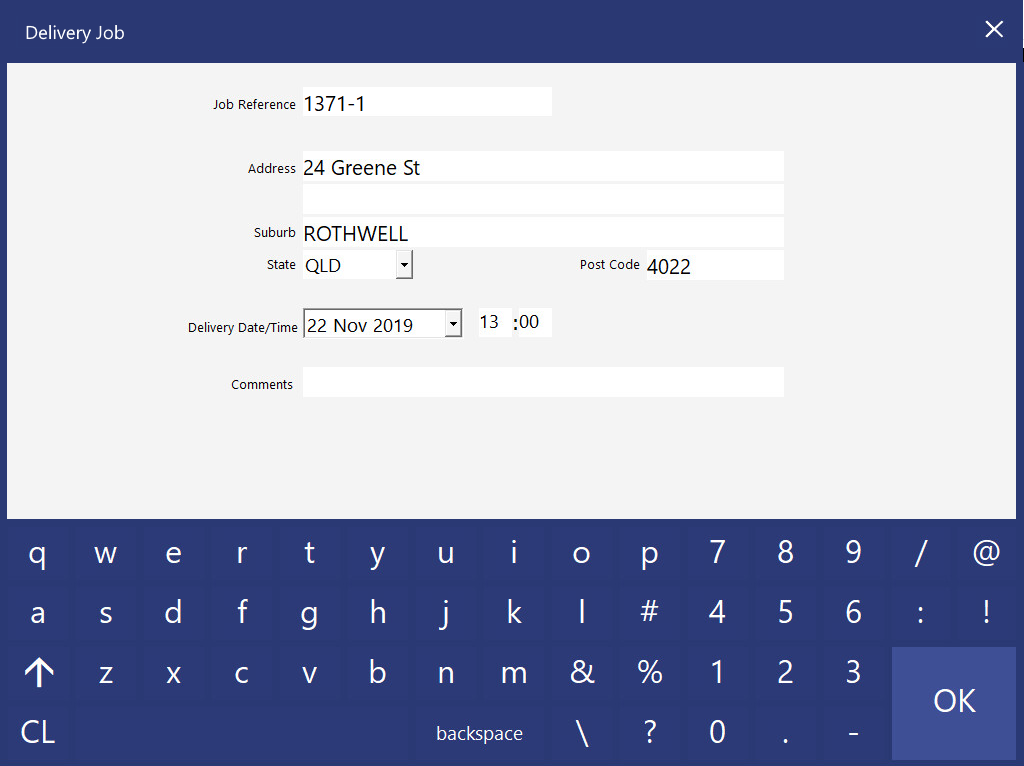
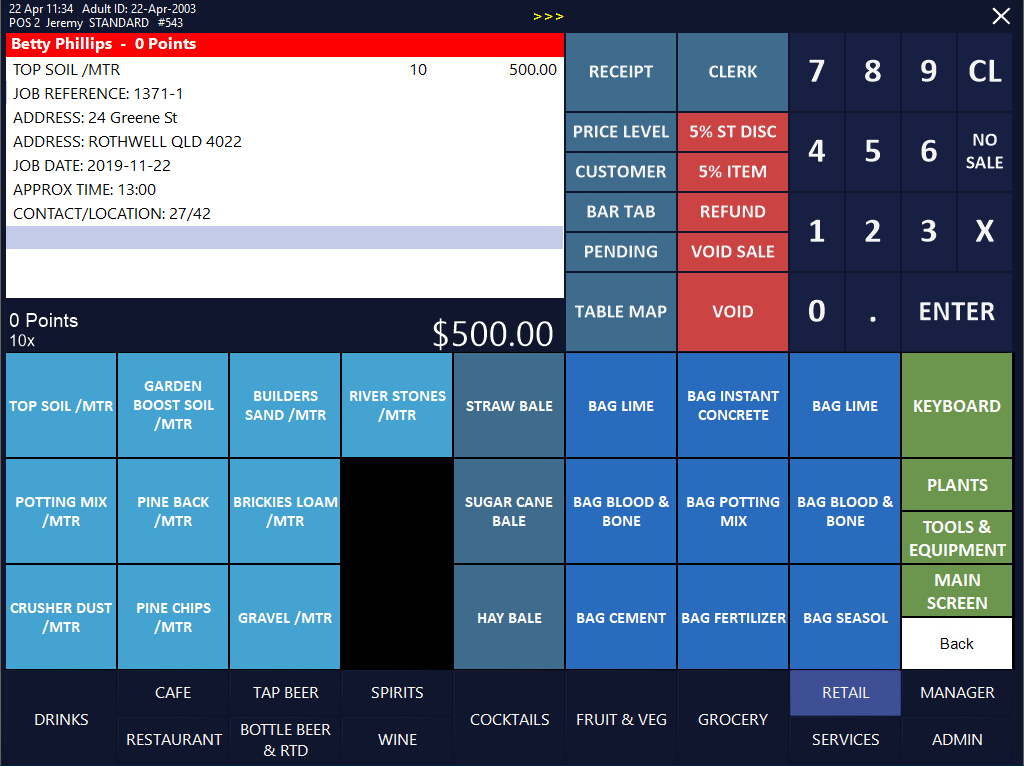
The POS will display a Delivery Job screen.
A Job Reference number will be auto-generated and the address will be pre-filled using the address from the Customer's record.
Enter the Delivery Date/Time when the Customer wants the job delivered.
If any additional comments are required, these can be entered into the Comments field.
Once the details have been entered into the Delivery Job window, press the "Save" button on the bottom-right corner of the screen.
The Delivery Job details will be entered into the sale.
Finalise the sale by pressing the ENTER button, then select a Tender from the list.

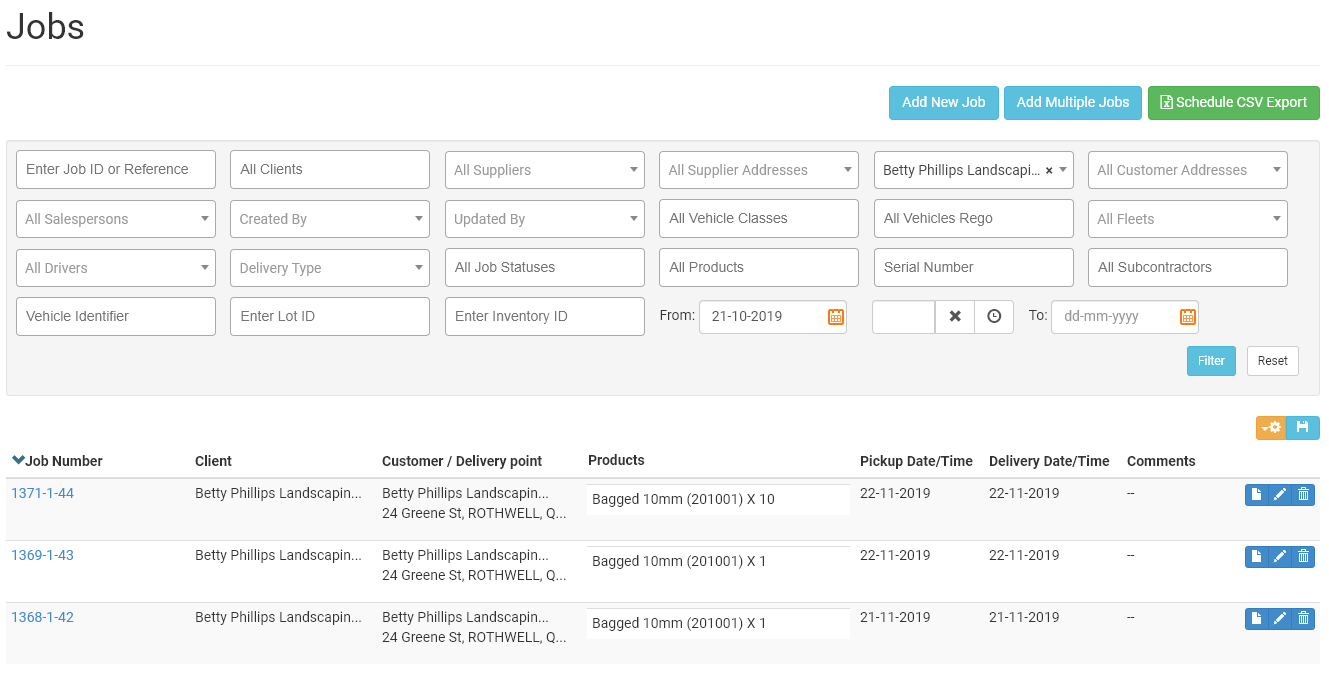
In Allotrac, Jobs will appear under Jobs.
Select the Jobs menu, then press "View Jobs".
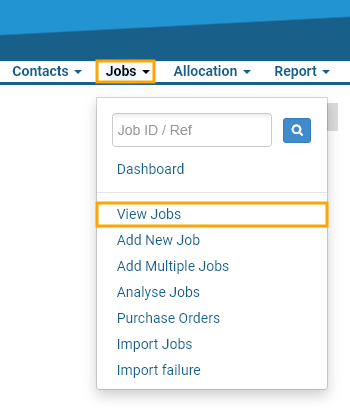
The Job that was sent from Idealpos will appear under the list of Jobs.
From this point on, the Job can be handled by the Allotrac Transport Management System: